
DIY Art Projector
Prior to opening the studio, I taught art to students K-5 in a K-12 school. We adopted many of the Reggio-based principles to best support students entering kindergarten from Reggio-inspired preschools. For a particular project, I worked with a group of kindergarten, 1st, and second graders to create works of art which involved using light and projection (light and shadow play are key tenets in Reggio-based learning). At the time we used a slide carousel and projector to make miniature works of colored art. Fast forward to today and I don’t have a slide projector (does anyone?) and I came across the slides we’d made. I thought this was a great opportunity to use these and create new ones while discovering basic projector technology without the use of a smart phone.
For those of you who have been following along as I’ve been teasing this project in our Instagram stories, THANK YOU! What I learned in this process is that I am analog at heart making my way through a digital world. I was hindered in my attempts to upload video on this blog because I don’t have a YouTube page and our website doesn’t support other video uploads…oh technology. Alas here is the full tutorial with a video I found over on YouTube to show a similar process from start to finish.
For the projector, the following materials are needed:

magnifying glass
pen
scissors
utility knife
small flashlight
masking tape
tacky glue
Instructions to build projector:
1) Using the foam, trace with pen to mark the cuts for the magnifying glass and flashlight.

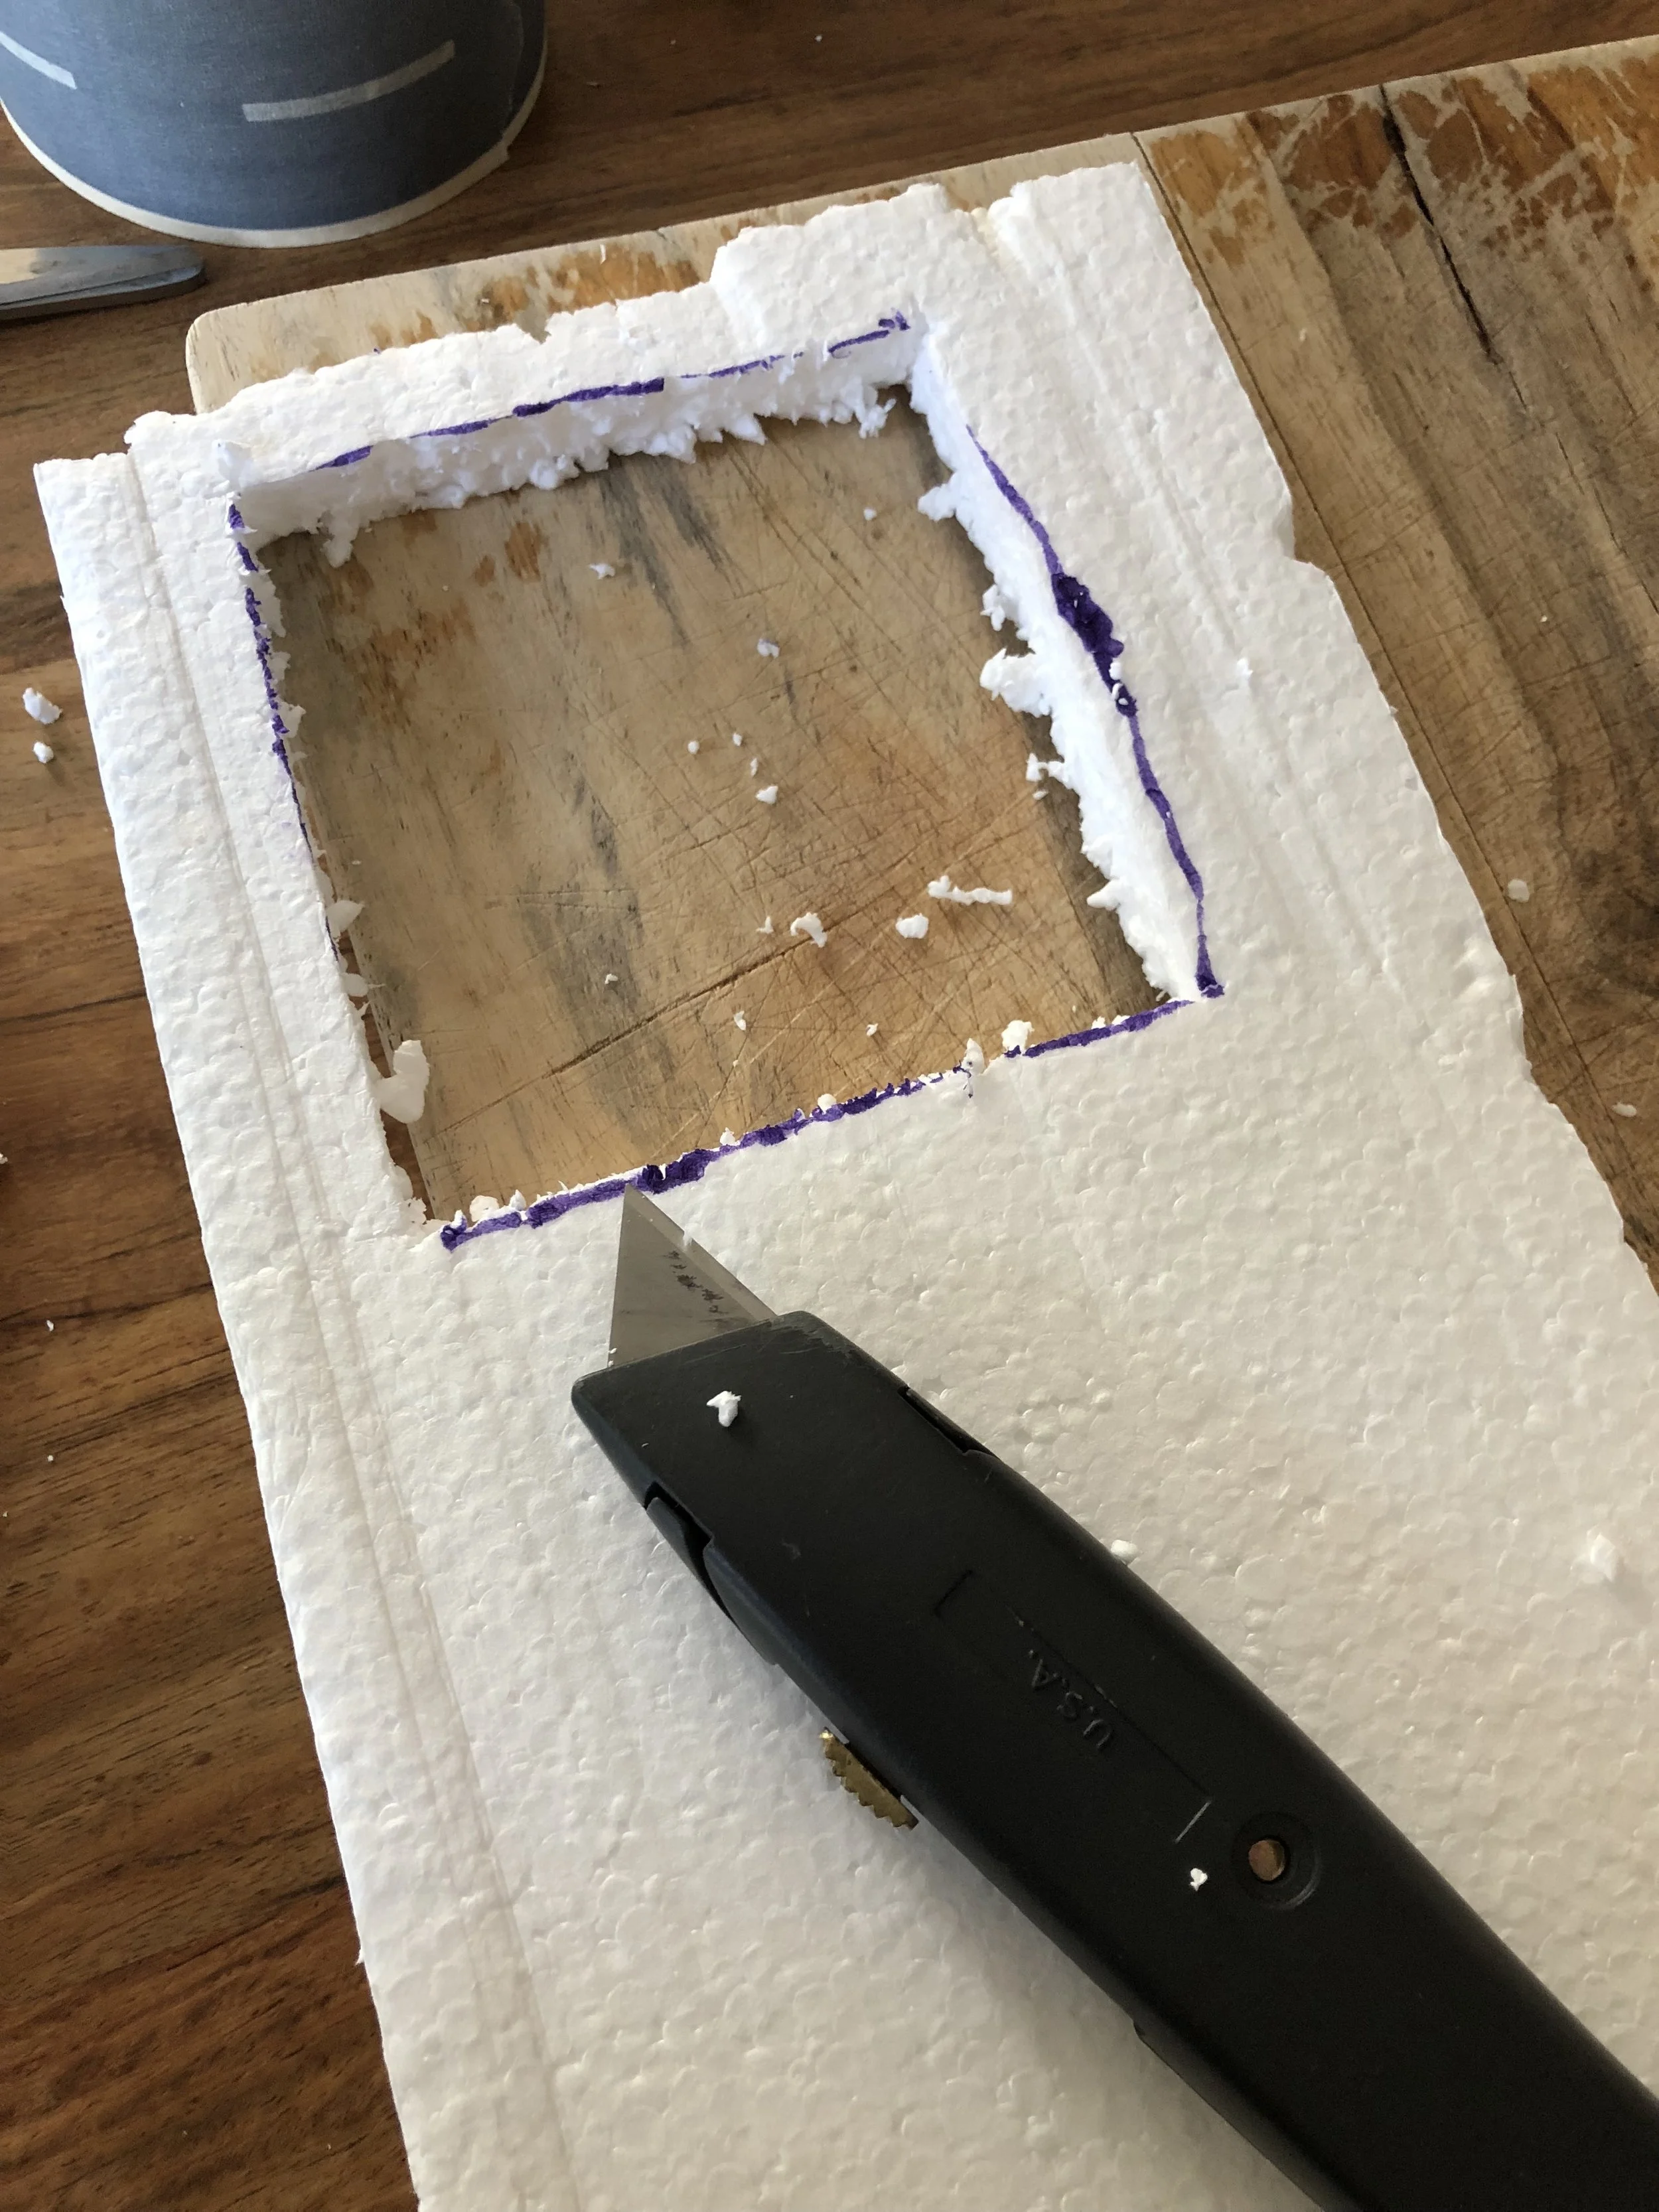
2) With utility knife, cut pieces to fit height and spacing of magnifying glass and flashlight. Measurements will vary depending on the size of the magnifying glass and flashlight.
3) Once your pieces are cut, apply glue to bottom of each pieced set in place on lateral foam base. The distance between the positions of vertical pieces will, again, vary depending upon the size of magnifying glass and flashlight.
4) Once in place, secure with masking tape. Allow to dry overnight.
5) While drying, begin to assemble artwork.
For the artwork, the following materials will be needed: glassless slide mount , colored gels , and scissors and clear tape
6) Create each mini artwork within the slide mounts by cutting and taping small pieces of colored gels within the frame. These abstract works of art provide open-ended exploration. Be sure to keep layers transparent and use minimal tape as possible.

Here is the You Tube video we based our foam projector on. We did not use the lightbulb technique.
While the process was challenging to stage for demonstration purposes, the experience was really fun. It was great using relatively basic materials to explore simple science and technology. I also enjoyed the creating of the slide mounts as mini works of art. I’d love to know what you think and if you try it.